Liquore al Lauro (Italian Bay Laurel Liqueur)

October 6, 2017

Making liqueurs at home is a time-honored Italian tradition. Limoncello is probably the most well-known but there are many others.

Many years ago at a now-shuttered artisanal Italian restaurant in the Andersonville neighborhood of Chicago I tasted house-made Liquore al Lauro, also referred to as Liquore Alloro.

I was hooked.

Every time I went to the restaurant, my meal ended with Liquore al Lauro.

Then the restaurant closed.

The Liquore al Lauro ended.

And I vowed to make it one day.

That day happened in late 2009 when our bay laurel plant was trimmed back for the winter. There was a pile of bay leaves on the kitchen counter. After I put a stash of them in the freezer for easy access during the winter (far, far better than dried!) I still had a pile that I couldn’t bear to discard.

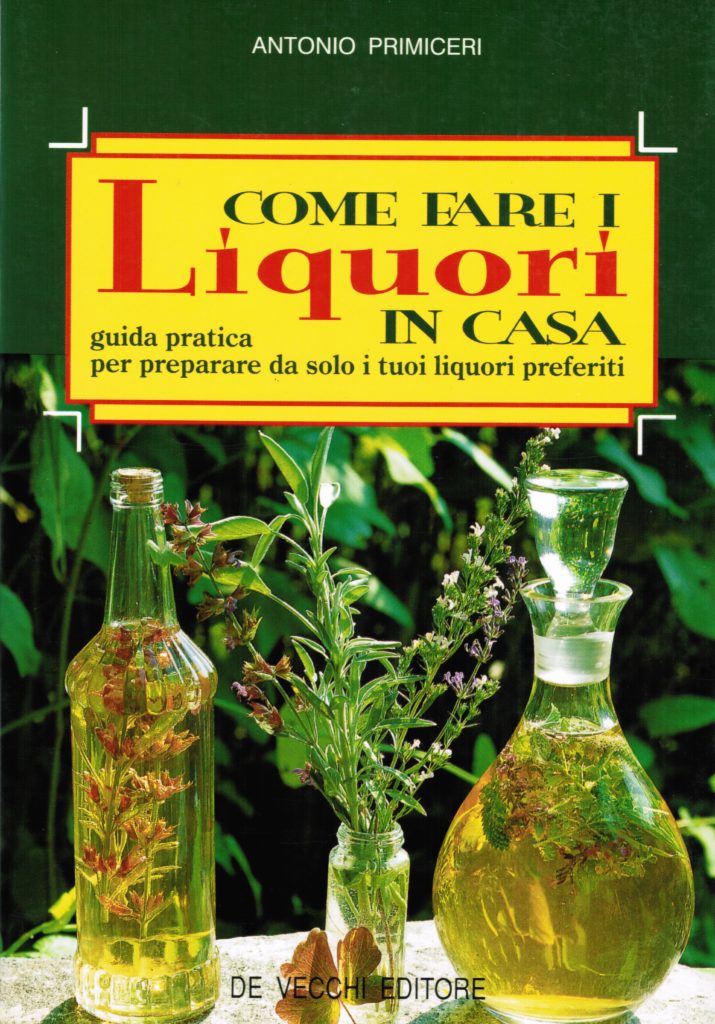
Out came a book I bought on a previous trip to Italy with my in-laws. I think it’s the same trip where we brought back a copper polenta pot (which you can see in my Polenta post), a grape press, and a super-fancy (and super-heavy) brass faucet that is a gargoyle head with a sea-creature coming out of its mouth out of which the water comes, among other things.

The faucet was ultimately to be incorporated into a garden fountain. That hasn’t yet happened but I’m not giving up.

The book “How to Make Liqueurs at Home” (see the photo below) had a recipe for Liquore al Lauro.

It was an ill-fated first attempt, however. I was using California bay leaves instead of Mediterranean bay leaves. When cooking, recipes often specify using half the quantity of California bay as Mediterranean bay as they are more aromatic. I was prepared to dilute the liquore to determine the correct quantity of California bay leaves so that wasn’t the major issue.

The real issue is that after I put up three large batches of bay leaves to macerate in alcohol, one plain, one with cinnamon, and one with coffee beans, my company landed a consulting contract in the United Arab Emirates.

Late fall into winter 2009 became a whirlwind of activity culminating with my moving to Dubai in January 2010 for much of the year.

A view from my apartment looking out at the Arabian Gulf and the man-made Palm Jumeriah island with the Atlantis hotel in the distance
Another view from the apartment looking at part of Dubai Marina, a 7 kilometer long man-made waterway
An evening view from the apartment

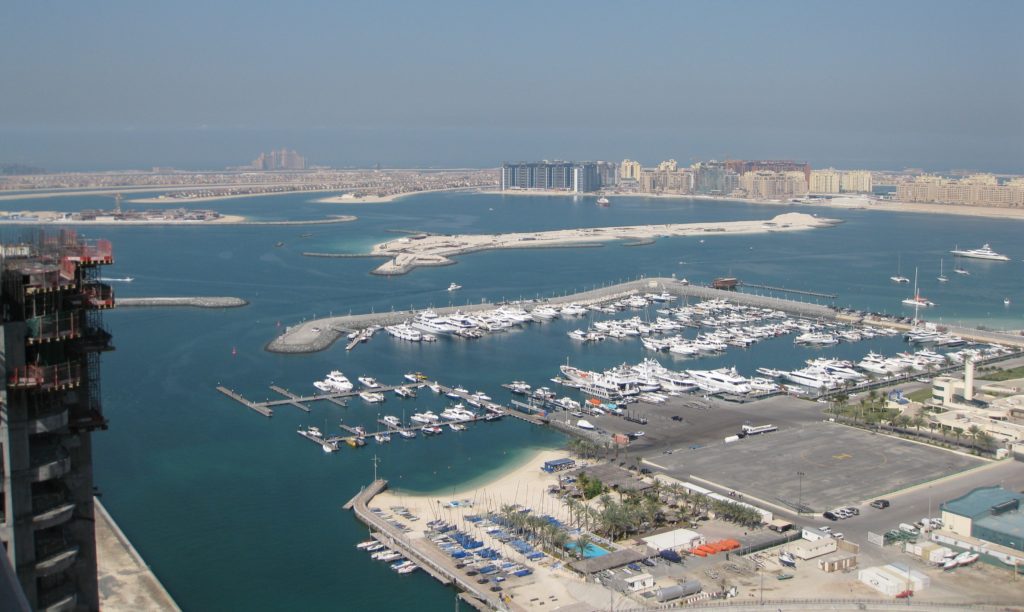
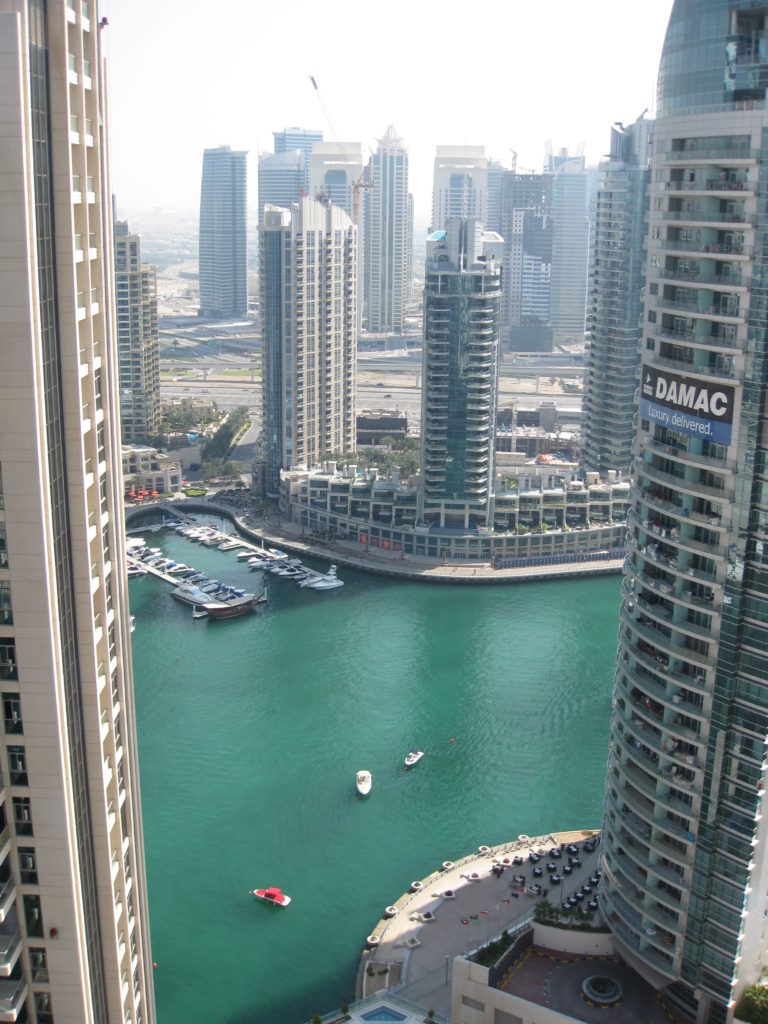
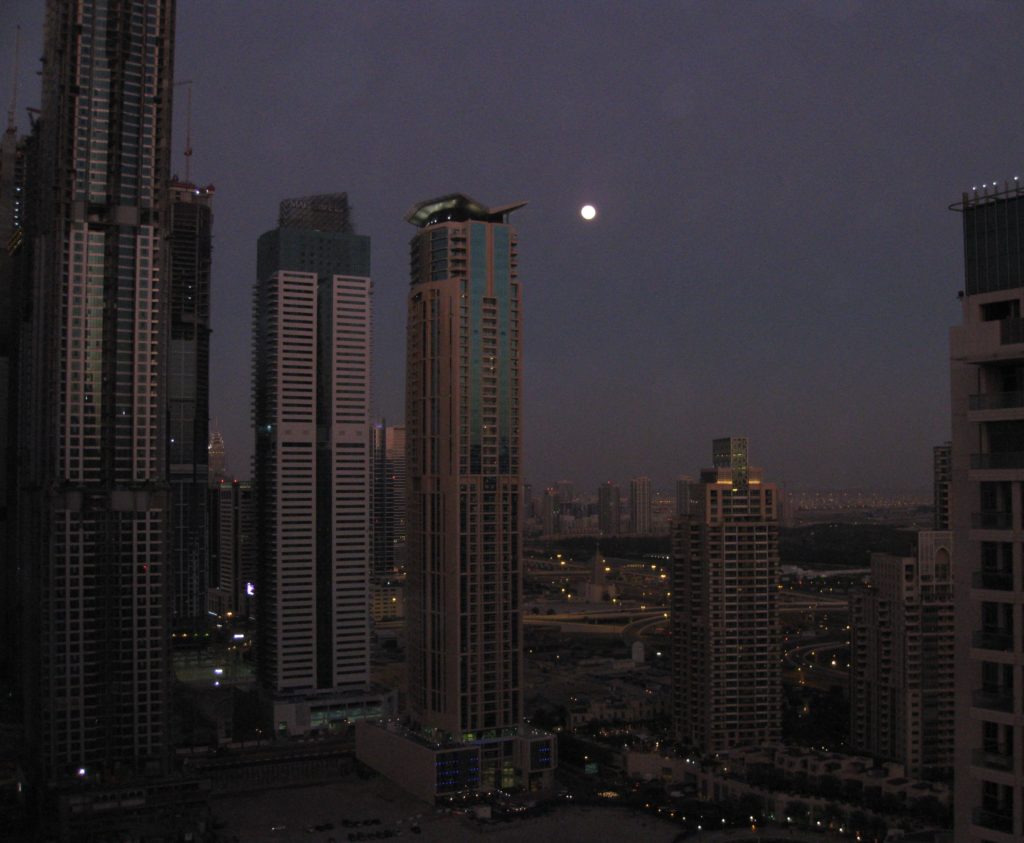
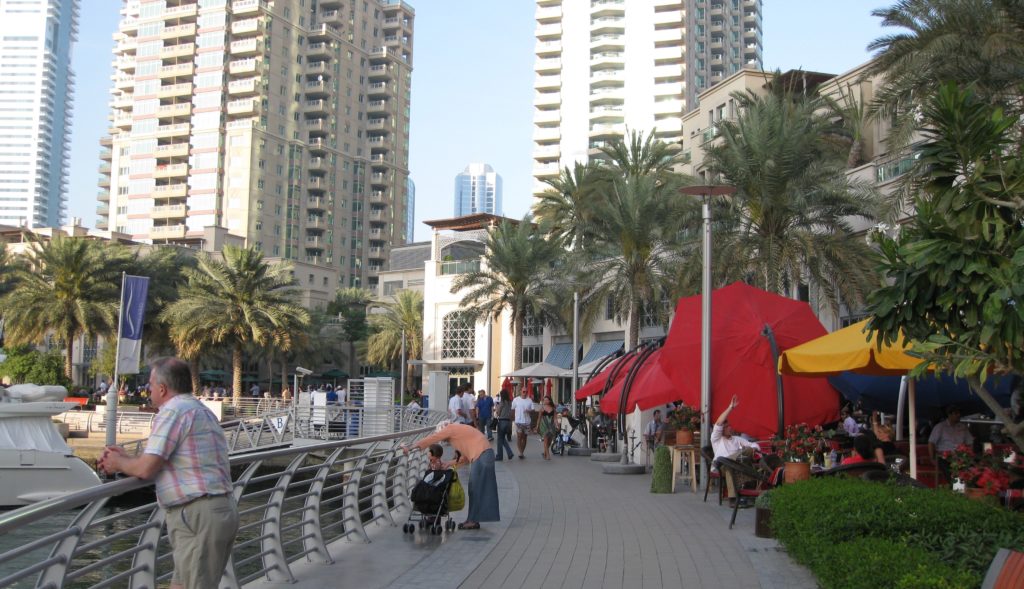
Dubai Marina is a paradise for walkersThe bay leaves macerated for months upon months. When I finally got around to trying to finish the Liquore al Lauro the mixture had turned bitter from over-extraction.

I had to discard gallons of bay-infused alcohol.

A few years went by before I decided it was worth trying again.
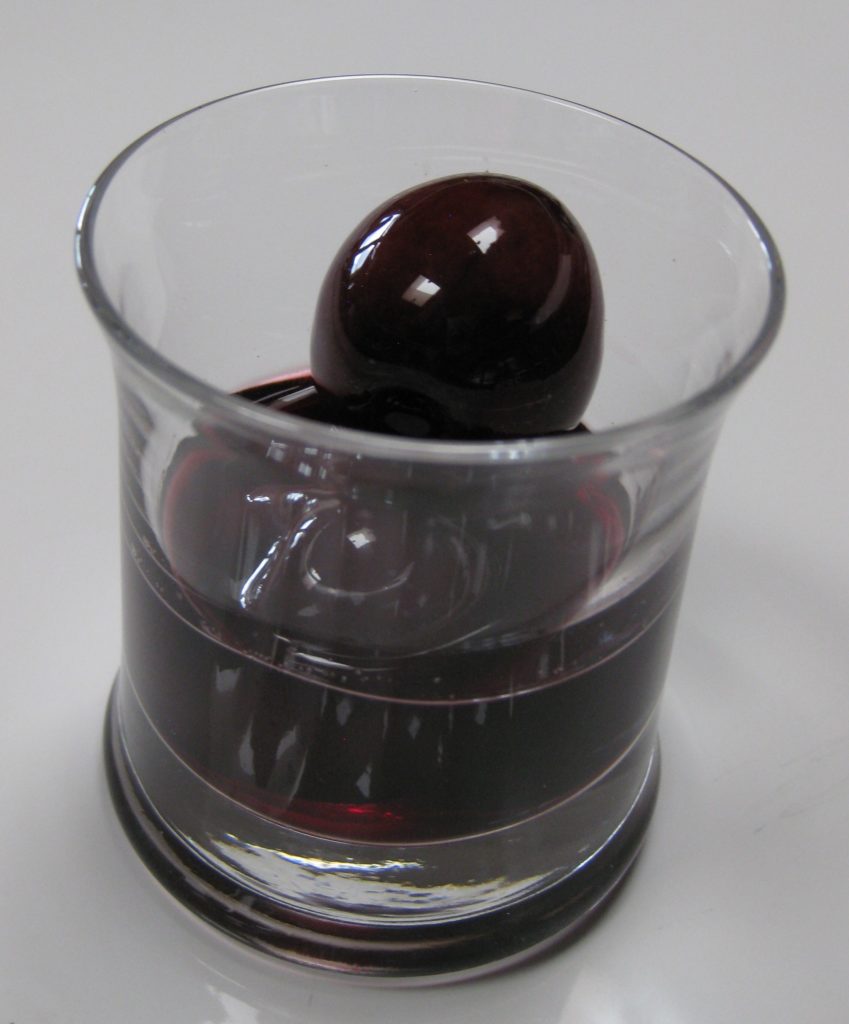
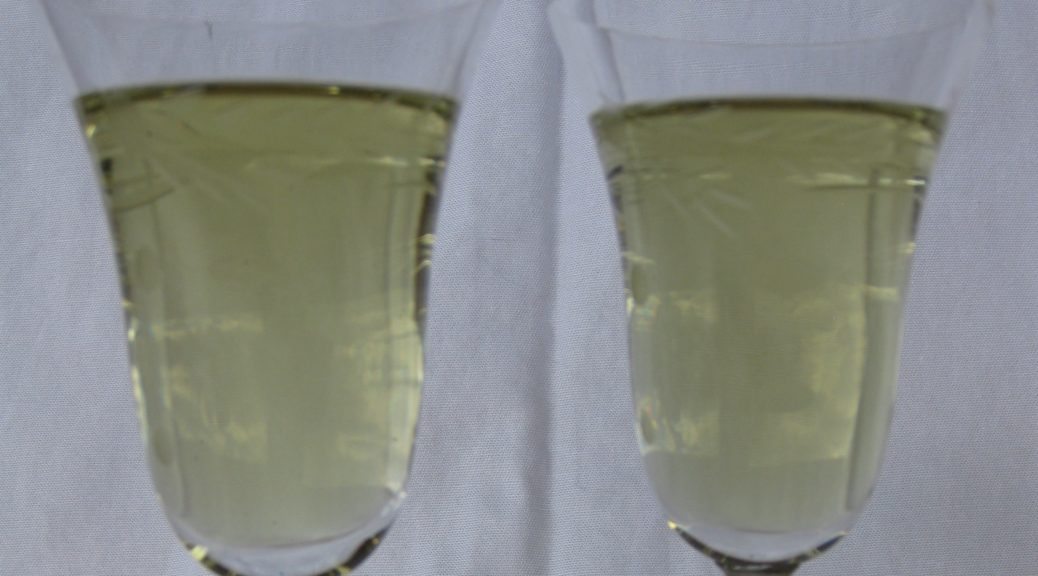
This time, I reduced the bay leaves by half right up front and shortened the maceration to four days to avoid any chance of bitterness. I made plain and cinnamon-infused but have not, to date, gone back to the coffee bean experiment.

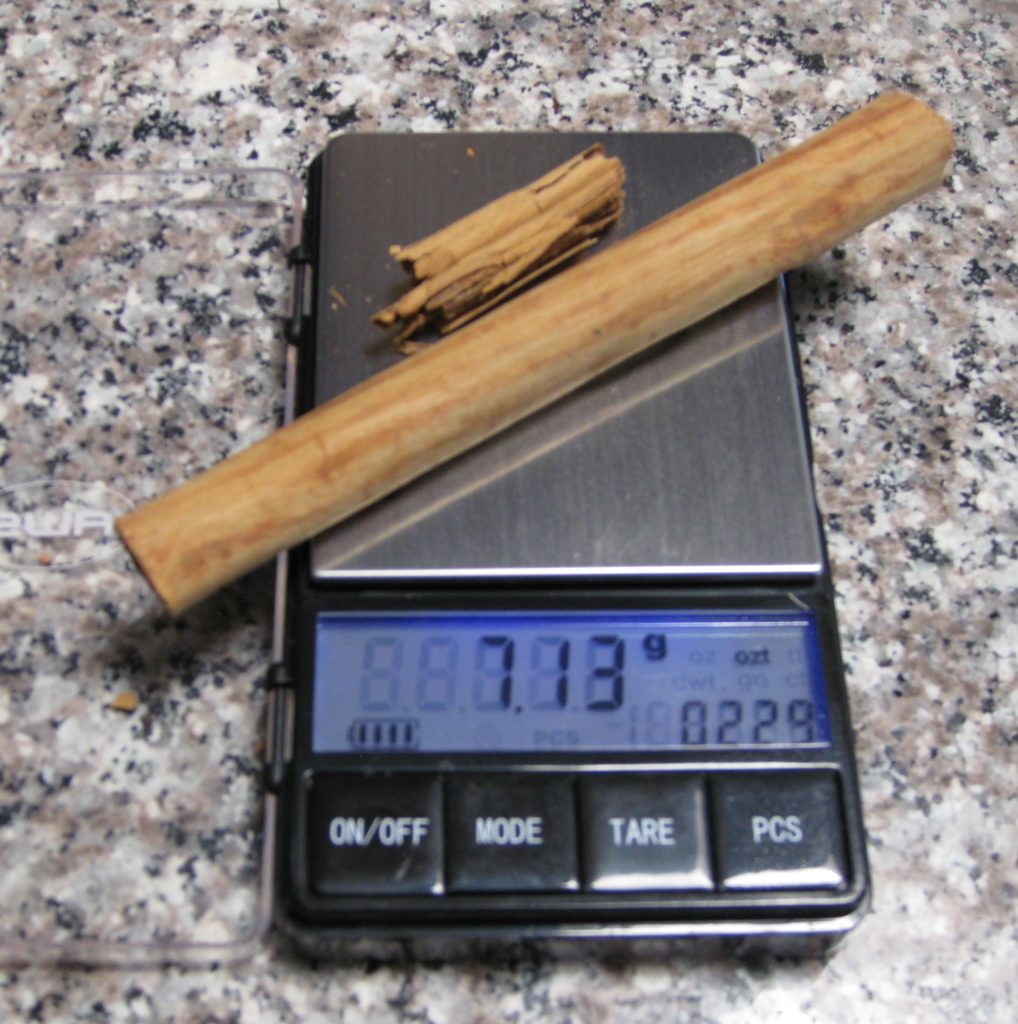
Because I want my recipes to be reproducible, I do my best to eliminate unnecessary variation. To that end, I weigh and measure ingredients precisely. For this recipe, I use a small metric scale that measures in hundredths of a gram (for the bay leaves and cinnamon), a large metric scale that measures in increments of one gram (for the sugar), and a graduated cylinder (for the water and alcohol). I can assure you that this does not happen in the average Italian household, nor does it need to happen in yours. The recipe app will convert the metric measures to US measures at the click of a button and I’ve provided an approximate count of bay leaves and inches of cinnamon stick that will work well.

The small scale that I use for precise weights

Follow us


Click HERE to join our mailing list and you’ll never miss a recipe again!

Print Recipe
Liquore al Lauro (Bay Leaf Liqueur)
Don’t be put off by the use of Everclear (or equivalent) the high proof is needed to extract the volatile oils in a reliable manner. The final liqueur ends up being about 63 proof, equivalent to most commercially produced liqueurs.
Votes: 1
Rating: 5
You:
Rate this recipe!
Course Beverages
Cuisine Italian
Prep Time 15 minutes
Passive Time 5 days
Servings
liters
Ingredients
Course Beverages
Cuisine Italian
Prep Time 15 minutes
Passive Time 5 days
Servings
liters
Ingredients
Votes: 1
Rating: 5
You:
Rate this recipe!
Instructions
  1. Wash the leaves in cool water and dry gently.
  2. In a jar with a tight-fitting lid that holds at least 2 quarts, combine the bay leaves, cinnamon (if using) and alcohol.
  3. Cover the jar and swirl.
  4. Put the jar in a cool spot out of direct sunlight for four days.
  5. Swirl the contents once or twice daily.
  6. On the third day, combine the sugar and water in a one-gallon jar (or other non-reactive container) with a tight-fitting lid.
  7. Swirl the sugar and water mixture every few hours throughout the day, until the sugar has dissolved. It can take up to 24 hours for the sugar to fully dissolve.
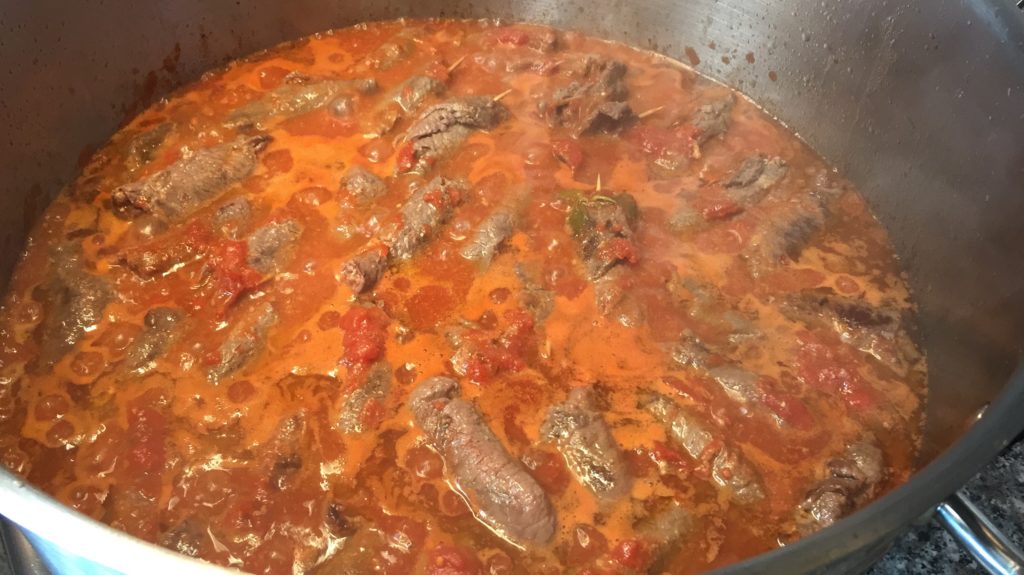
  8. On the fourth day, strain the bay-leaf-infused alcohol into the jar with the sugar water. The liquid may become cloudy but will become clear in about 24 hours with the occasional swirl.
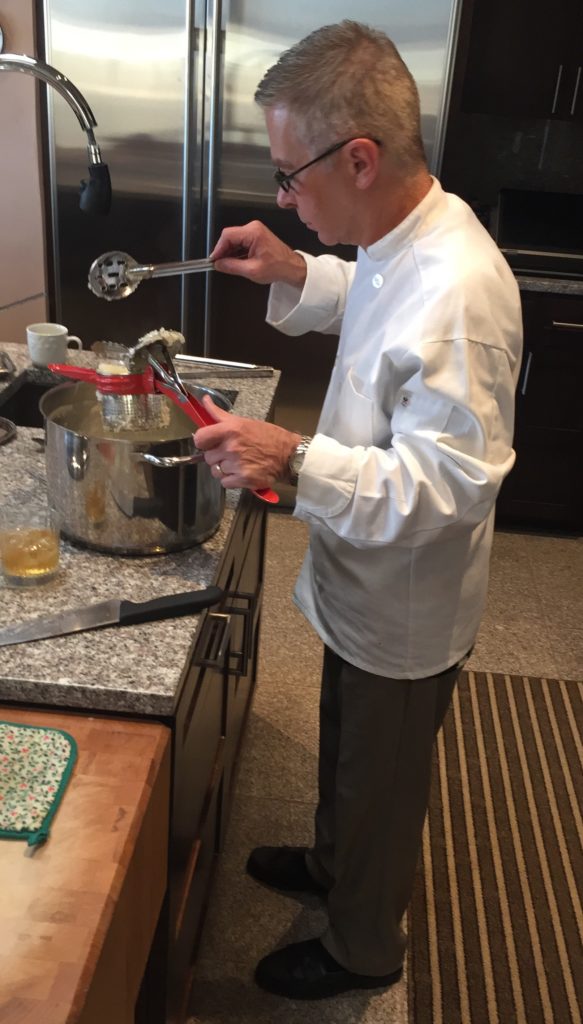
  9. After 24 hours, ladle the liqueur into smaller bottles, such as empty liquor bottles.
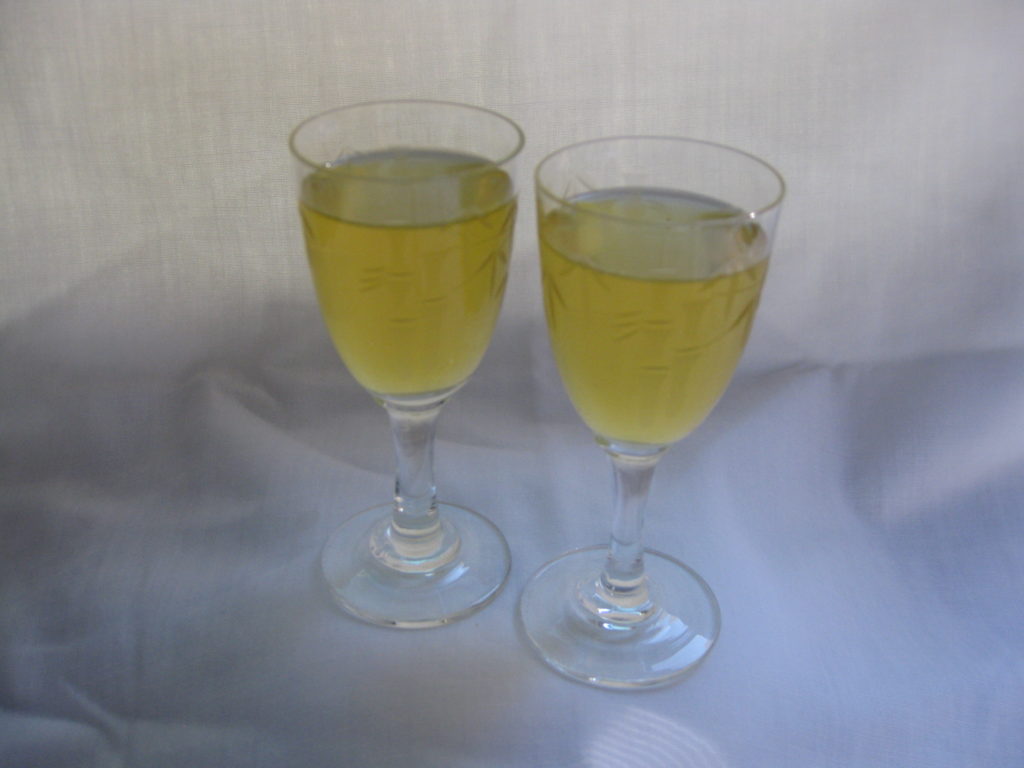
  10. Seal tightly and store in a cool, dark place for one month before drinking.
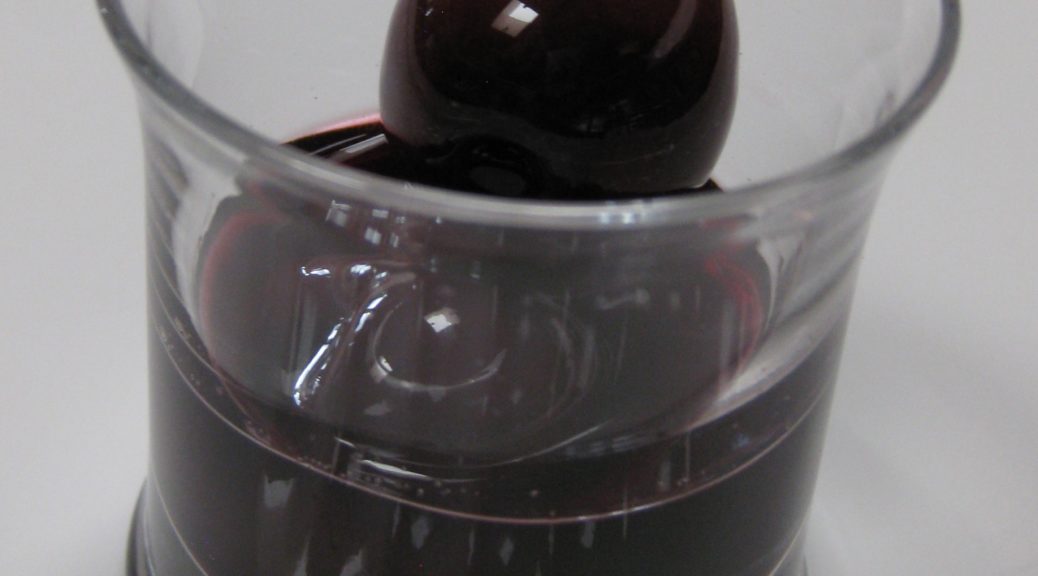
  11. Serve chilled or over ice or at room temperature based on your preference.
Recipe Notes

Copyright © 2017 by VillaSentieri.com. All rights reserved.

Share this Recipe

Roasted Sweet Peppers

October 2, 2017

Roasted peppers are a classic of Italian cuisine. They are a perfect example of ingredient-driven cooking. All that is required are good peppers, good olive oil, and a few minutes of scorching heat. There’s no way to hide bad ingredients, since there are only two (not counting salt).

A wonderful presentation is to prepare an array of roasted vegetables such as peppers, onions, zucchini, tomatoes, eggplant, and scallions served artfully arranged on a platter and anointed with extra-virgin olive oil and sea salt.

It’s a “wonderful” presentation because it looks beautiful, it tastes great, it’s easy to prepare, and it can all be done in advance and served at room temperature. It makes an impressive antipasto platter in the winter and an inviting warm-weather side-dish in the summer.

But let’s not get carried away. Peppers are classic and work very well on their own. If you like how they turn out you can experiment with other vegetables.

The first time I got serious about making these was back in the late 1980s when we lived in Chicago. We had a four story townhouse. The top floor was the master suite with a very large deck. We had redwood planters made to encircle the perimeter of the deck. In addition, we added scores of pots and, when things got a little too crowded on our deck, we expanded to Billy and Carla’s deck next door!

We grew an amazing amount of produce on that deck. I can’t begin to remember all of it but it included tomatoes, tomatillos, sweet peppers, hot peppers, eggplant, a fig tree, corn, cucumbers, zucchini, and an abundance of herbs including enough basil to feed a small country. We installed a grape arbor but the grapes didn’t do well.

We bought an upright freezer and put it in the garage so that we could put up food from the garden.

One year I roasted peppers and conserved them under a layer of olive oil in the refrigerator. They were good but I subsequently discovered that the USDA recommends against this technique as the covering of oil creates an environment where anaerobic bacteria, like the one that causes botulism, can grow.

After that first year, I didn’t preserve roasted peppers in olive oil again but I did make flavored olive oils and flavored vinegars every year right up until we moved full-time to Santa Fe. The USDA has the same recommendation regarding putting herbs in oil but, for some reason, I chose to ignore the advice.

These days, when I want roasted peppers, I just buy fresh peppers at the farmers market, farm stand, or supermarket and roast them. Luckily Bell peppers are available year-round.

In addition to good-quality ingredients, scorching heat is required. The idea is to blacken and blister the skin quickly. If you do that too slowly the flesh of the pepper cooks too much and becomes mushy. For all practical purposes, you cannot blacken the skin too quickly. The flesh will always cook enough to be good. My usual method, as described here, is to use my gas grill on very high heat. If I only want to roast one or two peppers, I put them directly on the gas flame of my stove. Like I said, you cannot blacken the skin too quickly.

As good as the peppers are on their own, they can be used as ingredients in other dishes. Remember the uncooked tomato sauce I posted a few weeks ago? I said that the dish could be made with roasted peppers when tomatoes aren’t in season. Now that tomato season is coming to an end, consider roasting a few extra peppers and using them to make pasta later in the week.


Follow us


Click HERE to join our mailing list and you’ll never miss a recipe again!

Print Recipe
Roasted Sweet Peppers
Red, yellow, and orange bell peppers are sweeter than green ones because they are fully ripe. I usually use an array of different colored peppers. Many recipes suggest steaming the peppers in a paper bag after roasting. I don’t like using a bag as it absorbs the juice that comes out of the peppers. A heatproof bowl with a tight-fitting lid allows the peppers to steam and preserves the pepper juices.
Votes: 0
Rating: 0
You:
Rate this recipe!
Prep Time 15 minutes
Cook Time 15 minutes
Passive Time 20 minutes
Servings
Ingredients
Prep Time 15 minutes
Cook Time 15 minutes
Passive Time 20 minutes
Servings
Ingredients
Votes: 0
Rating: 0
You:
Rate this recipe!
Instructions
  1. Heat a gas grill on the highest setting for at least 10 minutes.
  2. Put the peppers on the grill. Cover the grill
  3. Keep the heat on high.
  4. Turn the peppers every few minutes until the skin is evenly blackened.
  5. You will probably have to stand the peppers on their bottom end to get that part blackened.
  6. When the skin is black, put the peppers in a heatproof dish with a tight-fitting cover.
  7. Cover and allow the peppers to cool and steam for 10-20 minutes. This will finish cooking the peppers and loosen the skin.
  8. Holding the peppers over the dish to catch any liquid, remove the blistered skin using your fingers. The skin should slip off easily.
  9. Split the peppers in half. Using the tip of a sharp knife, remove the fleshy ribs of the peppers. Remove the seeds.
  10. Slice the peppers lengthwise in ½ inch wide strips.
  11. Pour the collected juices over the peppers, straining out seeds and skin.
  12. Sprinkle the peppers with olive oil, approximately 1 tablespoon per pepper. Toss well.
  13. Cover tightly and allow the peppers to sit at room temperature for an hour or two.
  14. When ready to serve, toss again and sprinkle liberally with coarse sea salt.
  15. The peppers can be made a day or two in advance and refrigerated after tossing with olive oil. Allow the peppers to come to room temperature for an hour or two before salting and serving.
Recipe Notes

Copyright © 2017 by VillaSentieri.com. All rights reserved.

Share this Recipe

Mom’s Ravioli

September 27, 2017

My strongest olfactory memory of childhood is gradually waking up on Sunday morning to the smell (perfume is a better characterization as far as I’m concerned) of garlic being sautéed in olive oil.

That was how most Sundays started.

My mother would get up early and start making her long-simmered Southern Italian Tomato Sauce (referred to as Ragu or Sugo if one’s Italian roots were close, “Gravy” if one grew up in New York or nearby, and often just “Sauce”). We unceremoniously called it “Spaghetti Sauce” though it was used on much more than spaghetti!

I think the better part of my culinary-cultural history is represented by that sauce. Every Italian family’s sauce is different, even if stylistic similarities can be identified. The sauces made by my mother and her two sisters that I knew, Aunt Margie and Aunt Mamie, were clearly related but also different. Each was good but it’s not as if they didn’t deviate from my Grandmother’s recipe. They were similar in that garlic and meat were browned in oil; tomato products, water, and seasonings were added; and the whole thing simmered for hours. The meats varied, the tomato products (tomato paste, tomato puree, whole canned tomatoes, etc.) and the proportions of them definitely varied as did the seasonings and other aromatics.

My mother’s “Spaghetti Sauce” to call it by its “historic” name, a name that I no longer use, is, without doubt, my most precious culinary treasure. I have only ever given the recipe out twice. In the 1970’s I gave it to John Bowker and his wife Margaret Roper Bowker. John was the dean of Trinity College in Cambridge, England. Recently I gave it to Robert Reddington and John O’Malley in Palm Springs after Bob lamented the loss of the recipe for the long-simmered tomato sauce he learned to make while living in Chicago.

With my mother’s sauce as the near-constant backdrop to our Sunday dinners, the rest of the meal varied. The sauce could be served with spaghetti or some other cut of dry pasta, or with my mother’s home-made fettuccine, or with ravioli. Although my favorite pasta is gnocchi, we never had those on Sundays as my father didn’t like them. Gnocchi (always home-made) were reserved for a weeknight meal during the times that my father worked out of town.

The sauce has an abundant amount of meat in it, pork, always cut in big pieces, never ground or chopped. Nonetheless, the pasta was often accompanied by my mother’s slow-cooked roast pork or maybe a roast chicken.

It seems incongruous now, but in the 1960s, before the widespread use of antibiotics, chickens were expensive! (I’m not in favor of the prophylactic use of antibiotics but I’m just saying that’s why chickens are relatively inexpensive now.) I still have a handful of my mother’s “City Chicken” sticks from the 1960s. They are round, pointed sticks slimmer than a pencil but thicker than bamboo skewers. Pieces of pork and veal would be skewered in alternating fashion on the sticks, breaded, and fried like chicken drumsticks. This was less expensive than chicken!!

City Chicken sticks

But back to Sundays…

Sometimes, after the sauce was bubbling away, my mother would make ravioli. Next to gnocchi, they are my favorite pasta, but manicotti and lasagna aren’t far behind.

We would eat our big meal around 1 PM on Sunday and my mother would get all of this done in time for that meal, including taking time to go to church, during which my Aunt Mamie, who lived upstairs, would be tasked with stirring the “Spaghetti Sauce.”

My mother’s (now my) ravioli mold.

Making ravioli in a group is a lot more fun. I also find that making the ravioli on a different day from the day they are cooked and eaten means that I am not as tired and I enjoy them more. The pictures in this post are from a Sunday when I got together with Rich DePippo, Susan Vinci-Lucero, and my in-laws, Marisa and Frank Pieri, to make ravioli. I think we made about 30 dozen ravioli!


Follow us


Click HERE to join our mailing list and you’ll never miss a recipe again!

Print Recipe
Mom's Ravioli
The filling can be made a day in advance and refrigerated, tightly covered. Ravioli freeze well. To do so, lightly flour a sheet pan that will fit in your freezer and put the ravioli in a single layer. Freeze about 30-45 minutes, until firm. Quickly put the ravioli in a zipper-lock bag and return to the freezer. Repeat with the remaining ravioli. My mother always made her dough by hand but I use a kitchen mixer and the beater, not the dough hook. Years ago, ground meat was not labeled with the percent fat. My mother would select a cut of sirloin, have the butcher trim off all visible fat and then grind it. I find that 93% lean ground beef replicates the experience.
Votes: 0
Rating: 0
You:
Rate this recipe!
Prep Time 2 hours
Passive Time 30 minutes
Servings
people
Ingredients
Filling
Dough
Prep Time 2 hours
Passive Time 30 minutes
Servings
people
Ingredients
Filling
Dough
Votes: 0
Rating: 0
You:
Rate this recipe!
Instructions
Filling
  1. Put the frozen spinach in a small saucepan. Add a few tablespoons of water. Cover and cook, stirring occasionally, until the spinach is completely thawed.
  2. Pour the spinach into a large sieve.
  3. After the spinach has cooled enough to handle, squeeze handfuls of the spinach to remove as much liquid as possible.
  4. Heat the olive oil in a 12-inch sauté pan until shimmering. Add the beef.
  5. Cook over high heat until the liquid has evaporated, breaking up the meat while cooking.
  6. Reduce the heat to medium and add the garlic, 1 teaspoon of salt, and black pepper to taste. Continue to sauté for 2-3 minutes more.
  7. Add the spinach to the beef.
  8. Continue to cook over medium to medium-low heat while breaking up the spinach and completely combining it with the beef.
  9. When the beef and spinach are well combined and no obvious liquid remains in the pan, add the beaten egg. Stir well and cook two minutes more. The egg should completely incorporate into the filling and no longer be visible.
  10. Adjust salt and pepper.
  11. On low heat, add 1/4-1/3 cup of breadcrumbs and combine well to absorb any remaining liquid or oil. If necessary to absorb any remaining liquid, add another tablespoon or two of breadcrumbs. If you cooked off all the liquid when browning the beef, and used lean beef, 1/3 cup of breadcrumbs should be enough.
  12. Cool the filling to room temperature before filling the ravioli.
Dough
  1. Put the flour, egg, and egg whites in the bowl of an electric mixer outfitted with a paddle.
  2. Mix on low until combined.
  3. Add the water, a little at a time, until the dough just comes together. The dough should not be the slightest bit tacky. You may not need all the water.
  4. Remove the dough from the mixer and roll into a log. Cover with a kitchen towel and allow to rest for 15 to 30 minutes before rolling out.
Assembly
  1. Set up your pasta machine, either a hand crank version or an attachment for your mixer.
  2. Cut off a small handful of dough.
  3. Flatten the dough, dust with flour, and run it through the pasta machine on the thickest setting.
  4. If the dough is catching on the rollers it may be too wet. Sprinkle liberally with flour.
  5. Run the dough through the same setting one more time.
  6. Run the dough through the pasta machine narrowing the setting by one notch each time. If the dough is getting too long to cover much more than two lengths of the ravioli mold, cut off the excess and continue.
  7. When rolling out the dough, use slow, even motion. If the dough is not rolling out to the full width of the machine, or at least wide enough to cover the width of the ravioli mold, fold it in half crosswise and run it through the machine again on whatever the last setting was.
  8. If the dough is not rolling out smoothly, and the issue is not that it is too damp, run the dough through the machine again on the same setting.
  9. On most pasta machines with five settings for thickness, you will want to stop rolling out the dough on the next-to-thinnest setting.
  10. Put the rolled out dough on a lightly floured surface and cover with a kitchen towel. Repeat with 2 or 3 more portions of dough.
  11. Allow the remaining dough to rest, covered, while filling and cutting the first batch of ravioli.
  12. To fill the ravioli, take the rolled out dough and lay it across the ravioli mold.
  13. Add a slightly rounded teaspoonful of filling to each ravioli. Do not overfill or the ravioli may break when being cooked.
  14. Fold the dough over the top.
  15. Lightly pat the top sheet of dough.
  16. Using a rolling pin, cut the dough along the zig-zag edges. Be careful to fully cut through the dough around the edges as well as between each raviolo.
  17. Remove the ravioli and place on a lightly floured surface. Cover lightly with a kitchen towel.
  18. Repeat with the remaining dough and filling.
  19. Cook, refrigerate, or freeze the ravioli.
Recipe Notes

Copyright © 2017 by VillaSentieri.com. All rights reserved.

Share this Recipe

Tiella (Southern Italian Vegetable and Pasta Casserole)

September 18, 2017

When I was growing up, we mostly socialized within the extended family plus a very few close family friends (that’s you, Joe and Betty Slivosky!).

It was a time (the 60’s) and place (small-town Western Pennsylvania) where it was rare to call in advance of a visit. One just showed up. This usually happened in the evening after dinner, though almost never on Monday or Thursday when the stores downtown were open until 9 PM and we dressed and went shopping after dinner.

Everyone would sit around (usually in the kitchen) drinking coffee (with caffeine), chatting…and smoking. Oh, the smoking! Occasionally the men would drink beer but unless it was a holiday or celebration of some sort, hard liquor was a rarity.

On Sundays, visiting frequently occurred (or at least started) in the afternoon and there might be two or three stops before heading home.

I can’t tell you how many times I heard the same stories. It’s one of the ways I developed a connection with family members, like my maternal grandparents, who died when I was very young.

To be sure, sometimes my cousin Donna and I would abandon the adults and pursue some childhood activity but we still hung out in the kitchen much of the time.

Often times the conversation would veer towards food; things my grandmother would make, the huge platters of cannoli one of my great aunts would make, what was eaten on holidays, and on and on.

There was the oft-repeated reminder of how my grandfather could come home late at night with a group of friends and how my grandmother would cook for them near midnight. There were stories of my grandmother cleaning and cooking chicken feet. My mother would talk about the time she killed a chicken in the basement and it got away from her and ran, headless, around the room. My father would remind everyone that the only food he didn’t like was gnocchi.

Food was a central feature of our lives.

So was conversation.

There were also times I would just sit in the kitchen and chat with my mother for hours. Relatives and food were common topics of conversation. There were dishes my grandmother made that I heard about over and over but never tasted because my mother never made them for some inexplicable reason. One of them was a quickly sautéed veal chop with a pan sauce made of the drippings in the pan, crushed canned tomatoes, peas, and seasonings. Back in the days when I cooked veal, I actually made it. Now I do it with pork chops.

The other dish that stands out in my memory from these conversations is Tiella. My mother talked of it frequently but never made it. The instructions were basic, a layer of pasta, a layer of potatoes, a layer of zucchini, and a can of tomatoes crushed by hand and poured on top. The whole thing was then baked. There wasn’t much of a discussion of which seasonings to use or proportions of ingredients. It was just assumed it would have garlic (of course it would have garlic) and the herbs that were commonly used in our family. Proportions…well…it just needed to look “right.”

For the number of times my mother rhapsodized about this dish, I can’t figure out why she never made it.

The first time I tried to make it was in the early 1990’s at our little house on Griffin Street in Santa Fe. That first time around, it didn’t live up to the hype, for sure, but it christened the house in an odd way.

In November 1992 my mother, my husband’s mother, and my husband’s grandmother traveled to Santa Fe with us for Thanksgiving week. We looked at property and fell for a little (1151 square foot) house on Griffin Street. My mother was terminally ill at the time. When we got back home, my mother insisted that we use her money for the down payment, which we did. She kept saying that she wanted to live long enough to return to that house in the spring. It didn’t happen. She died in early January.

All of the kitchen gear, china, and glassware for the house on Griffin came from my mother’s house. So, it was fitting that I should make this dish for the first time using my mother’s kitchenware in a house that we owned thanks to her.

It took me many years of working (off and on) on the seasonings and proportions to get it to taste great. (Well, I think it does.) The only real liberty I took with the dish is to use fresh tomatoes rather than canned when I make this in the summer.


Follow us


Click HERE to join our mailing list and you’ll never miss a recipe again!

Print Recipe
Tiella (Southern Italian Vegetable and Pasta Casserole)
This is a wonderful late summer dish when tomatoes are at their peak. If you make it at other times, use a 28 ounce can of whole tomatoes in place of the tomato puree and fresh tomatoes. Pour the liquid in the can over the potatoes instead of the puree. Crush the tomatoes by hand, add the seasonings described for fresh tomatoes, and arrange the crushed tomatoes on top.
Votes: 0
Rating: 0
You:
Rate this recipe!
Prep Time 1 hour
Cook Time 2 hours
Passive Time 30 minutes
Servings
people
Ingredients
Prep Time 1 hour
Cook Time 2 hours
Passive Time 30 minutes
Servings
people
Ingredients
Votes: 0
Rating: 0
You:
Rate this recipe!
Instructions
  1. Preheat the oven to 350°F.
  2. Combine the olive oil and crushed garlic in a small sauté pan. Sauté garlic until lightly browned. Remove the garlic and reserve the oil.
  3. Put the raw ditalini in the bottom of a deep, circular casserole, approximately 10 inches in diameter. The pasta should form a single layer with a fair amount of extra room for it to expand.
  4. Add 2 tablespoons of Parmesan cheese, ¼ of the minced garlic, and 2 tablespoons of the garlic oil and mix well.
  5. In a bowl, toss the sliced potatoes with half the rosemary, ⅓ of the oregano, ¼ of the basil, 2 tablespoons of Parmesan cheese, ¼ of the minced garlic, 2 tablespoons of the garlic oil, and a generous amount of salt and pepper.
  6. Arrange the potatoes neatly in overlapping layers on top of the ditalini. Do not wash the bowl.
  7. Season the tomato puree with salt and pour over the potatoes.
  8. In the same bowl used for the potatoes, toss the zucchini with the remaining oregano, ¼ of the basil, the remaining rosemary, 2 tablespoons of Parmesan cheese, ¼ of the minced garlic, 2 tablespoons of the garlic oil, and a generous amount of salt and pepper.
  9. Arrange the zucchini on top of the potatoes. Do not wash the bowl.
  10. Neatly arrange half the tomatoes on top of the zucchini. Season with half the remaining minced garlic, half the remaining basil, and salt and pepper.
  11. Arrange the remaining tomatoes on top and season with salt and pepper as well as the remaining garlic, basil, and all the parsley.
  12. Put the tiella in the preheated oven.
  13. Remove the crusts from several slices of day-old Italian or French bread. Whiz the bread in a food processor to make coarse crumbs.
  14. While the tiella bakes, toss the breadcrumbs with the remaining garlic oil in the bowl used for the potatoes and zucchini.
  15. After the tiella has baked for 90 minutes, sprinkle the oiled crumbs on top and bake till golden, approximately 30 minutes more.
  16. Allow to rest at least 30 minutes before serving. The tiella can be served warm or at room temperature. It can also be reheated in the oven briefly before serving, if desired.
Recipe Notes

Here’s the link for my recipe for homemade tomato puree (passata di pomodoro).

Copyright © 2017 by VillaSentieri.com. All rights reserved.

Share this Recipe

Angie’s Pickled Hot Peppers

September 13, 2017

With one set of grandparents and many relatives hailing from Southern Italy, hot peppers and foods containing hot peppers were staple features of the cuisine I grew up eating.

Hot sausage, with fennel seed, was frequently on our table and, since it was often homemade by Uncle Joe Medile, it could be as hot as we wanted. When it wasn’t Uncle Joe’s sausage, it would typically have been from Lopresti’s Market in Geistown, a suburb of Johnstown, PA.

Spicy foods more often showed up at lunch, though. There was spicy salumi, including Calabrese salami, capocollo (of which there are several types but in our house it was always the spicy one), and sopressata, among others.

There were hot banana peppers fried until tender, usually with onions. The fried peppers could be a condiment or they could be used as the filling for a sandwich. Fried hot pepper sandwiches are still one of my favorite lunchtime treats!

There were various pickled, spicy vegetables like giardineria and pickled peppers of various types. These were usually store-bought except for my cousin Angie’s pickled hot peppers.

Angie is the daughter of my mother’s oldest sister. Angie, however, was born six months before my mother. It’s kind of interesting to think about the fact that my grandmother was pregnant with my mother at the same time that my grandmother’s daughter was pregnant with Angie.

Despite their inverted ages, Angie always called my mother Aunt Theresa.

Angie’s mom, my Aunt Rosie, died at a young age. I never knew her. Aunt Rosie’s husband, Uncle Dominic lived with their other daughter, Marie.

Uncle Dominic grew vegetables, including hot peppers, in the back yard. He’s the one who taught me about fried hot pepper sandwiches for which I am eternally grateful!

Usually I would make Angie’s Pickled Hot Peppers with Italian Banana Peppers but fresh New Mexico Green Chile is far more abundant in Santa Fe than Banana Peppers and the substitution works just fine. Years past, when we lived in Chicago and grew lots of peppers, I would even make these with jalapeno peppers.

These peppers are a breeze to make, just some slicing and dicing and pulling together a quick pickle. No actual canning or processing is required. They will keep for months and months in the refrigerator.

The recipe calls for a peck of peppers. A peck is an interesting measure. It is eight dry quarts. A dry quart, however, is not the same as a liquid quart (unless you use the British Imperial system in which case a dry quart and a liquid quart are the same volume but not the same volume as any quart used in America).

Confused? Oh how I wish we used the metric system!!!

A dry quart is slightly larger than a liquid quart. Eight dry quarts equals 9 1/3 liquid quarts. If you go to a farmers market, chances are you’ve seen produce displayed in baskets that are one peck in size. Not to worry, though. First off, the measurements aren’t that critical for this recipe, so plus or minus a quart (dry or liquid) isn’t a big deal. Second, if you have any type of large container, pot, or bucket marked in liquid measure, just fill it up a little beyond the 9 (liquid) quart mark and you’ll be good to go.

If you’re buying peppers in the supermarket and don’t want to carry a bucket to measure a peck, I suggest buying approximately four pounds of banana peppers. I found that amount of New Mexico Green Chile came very close to a peck when I measured it out.


Follow us


Click HERE to join our mailing list and you’ll never miss a recipe again!

Print Recipe
Angie's Pickled Hot Peppers
Though usually made with hot Italian Banana Peppers, I made this batch with hot New Mexico Green Chile which is far easier to source in Santa Fe than are large quantities of Banana Peppers. Four pounds of peppers should come pretty close to a peck. A peck is 8 dry quarts which is the equivalent of 9 1/3 liquid quarts. If there isn’t enough pickling liquid to fully submerge the peppers, make a little extra following the proportions in the recipe. These peppers will keep well in the refrigerator for many months. Try to let them mellow at least a couple of days before eating them…if you can!
Votes: 0
Rating: 0
You:
Rate this recipe!
Prep Time 75 minutes
Passive Time 8 hours
Servings
quarts
Ingredients
Prep Time 75 minutes
Passive Time 8 hours
Servings
quarts
Ingredients
Votes: 0
Rating: 0
You:
Rate this recipe!
Instructions
  1. Wash and dry the peppers.
  2. Cut off the stem ends.
  3. Cut the peppers crosswise into rings a little more than 1/8 inch thick.
  4. Cut the celery into ¼ inch dice.
  5. In a non-reactive container large enough to hold all the ingredients, combine the vinegar, water, oil, garlic, salt, and oregano. Mix well.
  6. Add the sliced peppers and diced celery.
  7. Mix thoroughly. Cover and allow to sit at room temperature for 8 hours or overnight.
  8. Using a slotted spoon, ladle the peppers and celery into clean jars.
  9. Once the jars are filled, ladle the pickling liquid into the jars. Mix the liquid well with each ladleful so that you get the right proportions of vinegar/water and oil.
  10. If there is not quite enough liquid to cover the peppers make a small amount more using the same proportions.
  11. Cover and refrigerate until ready to use.
Recipe Notes

Copyright © 2017 by VillaSentieri.com. All rights reserved.

Share this Recipe

Pasta con Salsa Cruda (Pasta with Uncooked Tomato Sauce)

September 8, 2017

Pasta with a sauce of uncooked tomatoes, herbs and aromatics is one of the delights of late summer. While this is very easy to make, and only a few tomatoes are needed, the tomatoes must be vine-ripened.

If you have just one tomato plant you’ll probably have enough tomatoes to make a batch of Salsa Cruda. Farmers Market tomatoes are a good option this time of year, too.

Some of our tomato plants in front of the greenhouse and behind mesh to protect them from deer

I make this with our home-grown tomatoes which are always red but using some of the amazing heirloom tomatoes in colors of yellow, green, or purple available in farmers markets would make a dramatic sauce.

Colorful heirloom tomatoes on the bar at The Kirby Hotel in Douglas, Michigan: @thekirbyhotel

If you can’t get vine-ripe tomatoes, or you want to make a similar sauce at a time other than late summer, you can use two or three roasted red peppers in place of the tomatoes. I’ll be posting a recipe for roasted peppers next month, after tomato season is over. In a pinch, you can buy a jar of good-quality roasted peppers.

Although this recipe is not a traditional “family of origin” recipe it is one that I have been making for almost 30 years. I consider it to be one of my traditions.

While you can still get vine-ripened tomatoes, give this easy and delicious recipe a try.


Follow us


Click HERE to join our mailing list and you’ll never miss a recipe again!

Print Recipe
Pasta con Salsa Cruda (Pasta with Uncooked Tomato Sauce)
This makes enough sauce for one pound of pasta. Use pasta with a shape that will hold the sauce, such a small shells or fusilli. Although you can make the sauce in the time it takes the pasta water to come to a boil, it is better if the sauce is allowed to sit at room temperature for about an hour to allow the flavors to meld. Since the sauce is not hot, it is important to warm the serving bowl with boiling water just before using. I usually put some of the pasta-cooking water to warm the bowl. The optional aromatics (hot peppers, kalamata olives, and blue cheese) are really optional but definitely help to round out the flavor.
Votes: 0
Rating: 0
You:
Rate this recipe!
Prep Time 15 minutes
Cook Time 15 minutes
Passive Time 1 hour
Servings
people
Ingredients
Prep Time 15 minutes
Cook Time 15 minutes
Passive Time 1 hour
Servings
people
Ingredients
Votes: 0
Rating: 0
You:
Rate this recipe!
Instructions
  1. Coarsely chop the hot pepper.
  2. Coarsely chop the garlic.
  3. Combine olive oil, garlic, and hot peppers, if using, in the food processor.
  4. Process until finely chopped.
  5. Add basil, parsley, Parmesan cheese and Kalamata olives, if using.
  6. Pulse a few times to chop.
  7. Add tomatoes, blue cheese, if using, salt, and black pepper and pulse until finely chopped, but not pureed.
  8. There should definitely be some texture to the sauce.
  9. Bring three quarts of water to a rolling boil.
  10. Season the water with 1/3 cup of salt.
  11. Add the pasta and cook until al dente.
  12. When the pasta is done, reserve about ½ cup of the pasta-cooking liquid to thin the sauce if needed.
  13. Drain the pasta.
  14. Drain the hot water from the serving bowl. Add the pasta and sauce to the warmed bowl. Toss well.
  15. If needed, thin the sauce with some of the reserved pasta water. This will likely not be the case but it is always a good idea to have some pasta-cooking water available just in case.
Recipe Notes

Copyright © 2017 by VillaSentieri.com. All rights reserved.

Share this Recipe

Passata di Pomodoro (Homemade Tomato Puree)

September 4, 2017

Sometimes in the late summer my mother and Annie Castagnola would get together to “put up” tomatoes. I don’t really remember paying much attention to the process but I was fascinated by the jars and jars of red orbs sitting on an enamel table in Annie’s garage at the end of the day.

Annie lived in a jewel-box of a mid-century-modern house on a quiet residential street in Westmont, a suburb of Johnstown, PA where I grew up. She was always immaculately made-up, her hair coiffed, and frequently dressed in muumuus.

She was also a chain-smoker. There was a very large abalone shell on the coffee table on her side porch that served as a communal ashtray. I was always amazed at the number of cigarette butts that would collect in that shell over the course of a visit.

Though Annie was a very good cook, she was mostly known for her baking. Some of you may remember me mentioning her in an early blog about Totos, Italian Chocolate Spice Cookies.

Growing up we used a lot of canned tomatoes. My mother made her long-simmered Southern Italian Style Ragu most Sundays. Each batch used about a quart of canned tomatoes. The number of jars of tomatoes that my mother and Annie “put up” was nowhere near the 50 or so that would have been needed just to supply my family’s Sunday dinner table, let alone what Annie needed.

Those home-canned tomatoes, though, were a treat when they were used and a potent reminder of cultural heritage and a more agrarian family history.

These days I turn our home-grown tomatoes into passata (puree) rather than canning whole tomatoes. It’s easier. The results can be frozen successfully eliminating pressure canning at my 8000-foot elevation. And, since there aren’t enough home grown tomatoes to supply all of our tomato-product needs (canned tomatoes, tomato puree and tomato paste being the primary ones) I’ve opted for the most expedient option.

Though we had more tomato plants when we lived in Chicago, I still use the same field mix of canestrini, lunghi, and beefsteak tomatoes to make passata.

The canestrini, an heirloom variety, are grown from seeds that we brought back from Italy about 20 years ago. They were given to us by my husband’s Great Uncle Faliero (Great Aunt Fidalma’s husband). Every year, seeds are lovingly removed from several tomatoes, spread out on waxed paper, and allowed to dry. Since these are heirloom, and not hybrid, tomatoes, they breed true. The seeds are used to start the following year’s tomato seedlings.

Canestrini are meaty and don’t have an excess of jelly surrounding the seeds. They can also be ugly if one’s vision of a tomato is a perfectly formed red orb. The taste, however, is superior.

Canestrini tomatoes on the vine

The lunghi seeds are imported from Italy and are available domestically as are the beefsteak tomato seeds. Mostly we grow the beefsteak tomatoes for eating but there are always more than enough so they get put into the field mix for the passata.

Lunghi tomatoes

Making passata is really a breeze compared to canning whole tomatoes or making tomato paste. The tomatoes are washed, quartered, cored and coarsely chopped before being simmered into a pulp. They are then passed through an old-fashioned food mill, a step that only takes a few minutes, which eliminates the seeds and skin. They cook for about 2 ½ hours but it is mostly hands off other than the occasional stir.

Leaving the seeds and surrounding jelly in the chopped tomatoes means that the cooking time is a bit longer than it might otherwise be but there are two distinct advantages. Getting the tomatoes ready to cook is really quick. Perhaps more important, though, is that the jelly surrounding the seeds contains loads of naturally occurring glutamates which boost the savory “umami” quotient of the tomatoes.

If you have access to vine-ripe tomatoes, grab yourself 15 or 20 pounds and give this recipe a try. You won’t be sorry!

Click here for a video showing the process of making tomato puree.


Follow us


Click HERE to join our mailing list and you’ll never miss a recipe again!

Print Recipe
Passata di Pomodoro (Homemade Tomato Puree)
This easy-to-make tomato puree can be frozen for later use. It brings a blast of late-summer goodness to winter meals. Ten to 20 pounds of tomatoes is a good amount to start with. If you are planning on using more than 20 pounds, I would either divide the tomatoes among several pots or find an extra-wide rondeau (a wide shallow pot) so that there is enough surface area to foster evaporation.
Votes: 0
Rating: 0
You:
Rate this recipe!
Prep Time 20 minutes
Cook Time 3 hours
Servings
quart
Ingredients
Prep Time 20 minutes
Cook Time 3 hours
Servings
quart
Ingredients
Votes: 0
Rating: 0
You:
Rate this recipe!
Instructions
  1. Wash and dry the tomatoes.
  2. Cut the tomatoes into quarters from top to bottom.
  3. Remove the hard bit where the stem attaches and any bad areas.
  4. Coarsely chop the tomatoes.
  5. Put the tomatoes into a heavy-bottomed, non-reactive pot (such as stainless steel).
  6. Add one teaspoon of salt for every quart of chopped tomatoes.
  7. Cover the pot and bring to a boil over medium-high heat. This will take approximately 10-20 minutes depending on volume of tomatoes.
  8. Remove the cover. Stir the tomatoes.
  9. Boil gently, uncovered, for 2 ½ to 2 ¾ hours, stirring every 15-20 minutes. It takes a bit of practice to estimate how much to concentrate the tomatoes to get the desired thickness of puree but don’t sweat it, the tomatoes can be cooked further.
  10. Pass the cooked tomatoes through a food mill to remove skin and seeds.
  11. If the puree seems too thin, return it to the pot and cook it a bit longer after passing it through the food mill.
  12. Portion and freeze or use as desired.
Recipe Notes

A rondeau is useful if you are going to prepare more than 20 pounds of tomatoes as it provides more surface area for evaporation than a deep sauce pan.

A rondeau is a wide, shallow pot

Copyright © 2017 by VillaSentieri.com. All rights reserved.

Share this Recipe

Carne di Manzo in Umido (Thinly Sliced Beef in Tomato Caper Sauce)

August 30, 2017

As I am writing this, my husband’s Great Aunt Fidalma and cousin Massimo are visiting us from Tuscany. We’ve had quite a week of eating and drinking.  Every night, actually, was something like a party. At the lowest head count we were 6, but more often 9, and once 20!

From left to right: Massimo, me (holding Abby), my father-in-law, Zia Fidalma, Zia Ida, my mother-in-law.

Last night I fried a bunch of zucchini flowers to accompany cocktails. Zia Fidalma made little elongated meatballs (polpette) with ground beef and mortadella seasoned with onions, garlic, and herbs. I made risotto with mushrooms and my mother-in-law made long-simmered green beans in tomato sauce, something like my green beans in tomato sauce with bacon.

Risotto with Mushrooms, Meatballs, Green Beans in Tomato Sauce

While we were sitting at the table after dinner doing what Italians do (talking about growing food, talking about preparing food, talking about food we’ve eaten, and talking about the next meal) Zia Fidalma started to describe a dish of thinly sliced beef cooked in tomato sauce with capers.

“Carne di Manzo in Umido!” I said.  She concurred.

I told her that Carne di Manzo in Umido was, in fact, the long-planned blog post for Wednesday.

It is a dish I had at her home in Tuscany about 20 years ago. I wrote down the recipe in a combination of English and Italian and American and Metric measures sitting at her kitchen table. It took me a while to get it right but I think I’ve nailed it.

Here’s a quick rundown of the food we’ve had over the past week:

August 23rd: Pasta with Zucchini, Chicken Thighs braised in Red Wine and Balsamic Vinegar, Salad, Cherries in Brandy, Homemade Limoncello, and Homemade Bay Leaf Liqueur (being posted in October).

Cherries in Brandy
Homemade Limoncello

August 24th: Tiella (being posted in September), Grilled Hot and Sweet Italian Sausage, Grilled Broccolini drizzled with Olive Oil, and more Cherries in Brandy, Homemade Limoncello, and Homemade Bay Leaf Liqueur.

August 25th: Zia Fidalma’s Rouladen (German, I know, but Zia Fidalma lived in Germany for many years), Mashed Potatoes, Corn on the Cob and, you guessed it, more Cherries in Brandy, Homemade Limoncello, and Homemade Bay Leaf Liqueur.

Zia Fidalma making the filling for her rouladen
A watchful eye on the cooking rouladen
Rouladen bubbling away
Zia Fidalma and a platter of rouladen
Me making mashed potatoes (with a side of bourbon)

August 26th (for 20 people): A Massive Antipasto Platter thanks to cousins Paul and Kim Phillips (and a shopping spree at Cheesemongers of Santa Fe), Baked Penne with Ham, Peas, Mushrooms and Roasted Garlic Besciamella, Porchetta, Corn Sautéed in Butter, Sformato di Spinaci, and Italian Almond Torta with Raspberries and Plum Crostata (thanks to Rich DePippo). Then there were those ever-present Cherries in Brandy, Homemade Limoncello, and Homemade Bay Leaf Liqueur.

Kim and Paul fortify themselves at the Santa Fe Farmers Market before heading off to a marathon shopping session at Cheesemongers of Santa Fe
Antipasto
A bit more antipasto
Baked Penne with Ham, Peas, Mushrooms and Roasted Garlic Besciamella
Porchetta
Sformato di Spinaci
Almond Torta with Raspberries and Plum Crostata

August 27th brought some sanity as we had leftovers from the 26th. (We could still feed a small army with the remains of Paul and Kim’s Antipasto Shopping Spree.)

August 28th: As described above, meatballs, risotto, and green beans.

I neglected to mention that we went through cases of wine and then there was a dark chocolate cake from Chocolate Maven Bakery in Santa Fe that kept making its appearance most nights right before we broke out those cherries.

Dark Chocolate Cake from Chocolate Maven Bakery

Eating will slow down a bit now that the relatives have left. As I finish writing this the house is perfumed from a large pot of chicken broth that will get portioned and frozen ready to be pulled out of the freezer in the coming weeks for wave after wave of risotto made with the freshest vegetables the market has to offer.


Follow us


Click HERE to join our mailing list and you’ll never miss a recipe again!

Print Recipe
Carne di Manzo in Umido
Thinly sliced beef is browned and then simmered in the barest amount of tomato sauce with an array of herbs. A bit of capers round out the flavors.
Votes: 0
Rating: 0
You:
Rate this recipe!
Course Mains, Meats
Cuisine Italian
Prep Time 20 minutes
Cook Time 2 hours
Passive Time 1 hour
Servings
people
Ingredients
Course Mains, Meats
Cuisine Italian
Prep Time 20 minutes
Cook Time 2 hours
Passive Time 1 hour
Servings
people
Ingredients
Votes: 0
Rating: 0
You:
Rate this recipe!
Instructions
  1. Herbs, clockwise from top right: nepita, bay leaf, sage, rosemary, oregano.
  2. Combine the flour and 1 ½ teaspoons of salt. Mix well.
  3. Pound the steak lightly with a mallet.
  4. Season the steak with salt and pepper. Cut the pieces in half if they are too large after pounding.
  5. Dredge the steak in the seasoned flour and reserve. It is best to do this about an hour in advance as the flour will adhere to the meat better.
  6. Bruise the garlic with the side of a large chef’s knife.
  7. Put a thin film of olive oil on the bottom of a very large sauté pan. Heat over medium high heat.
  8. When hot, add as much of the beef as will fit without crowding in a single layer. Add half the garlic.
  9. Sauté the meat and garlic until the meat is browned on both sides.
  10. Remove the browned meat to a platter. Repeat with the remaining meat and garlic, in however many batches are needed.
  11. If the garlic starts to turn dark brown, remove it or it will become bitter.
  12. When all the meat is browned return it to the pan with any accumulated juices. Leave the cooking oil in the pan.
  13. Try to arrange the meat so that the pieces overlap rather than putting one piece of meat directly on top of another.
  14. Add all the other ingredients except the capers.
  15. Cover and simmer gently until meat is tender flipping the meat every 20 minutes or so. It will take at about one and one-half to two hours to get the meat tender depending on the cut and your elevation.
  16. Add water from time to time if the sauce boils away.
  17. Rinse the salt off the capers and add them during last five minutes of cooking. Taste and adjust salt and pepper.
  18. There should be a very small amount of sauce along with oil that is red from the tomato. Do not remove the oil, it adds significantly to the mouthfeel of the sauce.
Recipe Notes

Copyright © 2017 by VillaSentieri.com. All rights reserved.

Share this Recipe

Cherries in Brandy

Italians love putting fruit in liquor. Cherries. Grapes. Prunes. The list goes on.

This practice meshes nicely with the Italian practice of making homemade cordials. (For example, see the post on homemade limoncello.) The liquor in which the fruit macerates becomes, in essence, a cordial that can be drunk on its own or with the fruit.

I learned to make cherries in liquor from my mother-in-law. She learned from her mother.  She even remembers  her grandmother making them. You can bet the chain of cherries in brandy goes back way further than that. She does grapes, too, in exactly the same way.

Here’s a picture of my in-laws with my (now) husband circa 1959. Pretty Italian, huh?

My mother-in-law hails from the little town of Treppo Grande way north of Venice. Treppo Grande is in Friuli which is known for its wine, especially white wines.

My mother-in-law’s parents circa 1929.

They also make a mean grappa in Friuli. After all, you’ve got to do something with all that leftover grape pomace from making wine.  It can be fermented one more time and distilled into an Italian version of white lightening.

My mother-in-law’s grandmother.

Actually preserving fruit in alcohol had a long tradition in Europe. Americans may be most familiar with the German tradition of Rumtopf. Traditionally, Rumtopf is made from an array of fruit, using the best of what ripens in sequence from early summer through early fall, mixed with over-proof rum and sugar. In addition to being made from a mixture of fruits, the proportion of sugar used in Rumtopf is much greater than would be used in Italian alcohol-preserved fruits.

Rumtopf makes a great topping for ice cream or cake. In college I even used it as the fruit layer in upside-down cake.

What a difference a few years makes. My in-laws with my husband (right) and (now) brother-in-law.

Cherries and grapes preserved in alcohol (we use brandy or grappa) will keep for years though at some point the texture starts to suffer. Traditionally, these fruits would be put up in the summer for consumption during Christmastime. Some years we make such a supply of them that we work through them for years afterwards.

Popping one of these cherries into a Manhattan is a real treat!

This is what our current stash of cherries and grapes in liquor looks like. We have “vintages” dating back a few years, including cherries that we picked from cherry trees belonging to Rich DePippo and Doug Howe as well as Bruce Donnell.

The traditional way to serve this is as a digestive after dinner. Put a few cherries or grapes in a cordial or shot glass and add a bit of the liquid from the jar. Drink the liquid then roll the fruit, one at a time, into your mouth. You’ll need to extrude the cherry pit after freeing it from the flesh.


Follow us


Click HERE to join our mailing list and you’ll never miss a recipe again!

Print Recipe
Cherries in Brandy
Use the best, peak season fruit you can find. Cherries and grapes work equally well in this recipe. The amount of sugar is a matter of preference but I find these proportions work well. We’ve made this using domestic brandy and French brandy. Honestly, I don’t think the price differential of imported brandy is justified. Grappa is also a traditional spirit but, again, you’d be looking for a pedestrian, but drinkable, grappa, not one of the über-expensive artisanal grappas. The recipe is infinitely expandable and very quick to pull together. If your jars are larger, just increase the sugar. I have collected an (almost) endless supply of these jars from French jams and use them over and over.
Votes: 0
Rating: 0
You:
Rate this recipe!
Course Miscellaneous
Cuisine Italian
Prep Time 10 minutes
Servings
persons
Ingredients
Course Miscellaneous
Cuisine Italian
Prep Time 10 minutes
Servings
persons
Ingredients
Votes: 0
Rating: 0
You:
Rate this recipe!
Instructions
  1. Wash the fruit and dry thoroughly.
  2. Remove the stems from the cherries.
  3. Put the fruit into the jar, fitting it in snugly but not smashing it.
  4. Add the sugar.
  5. Fill jar with brandy or grappa to cover the fruit.
  6. Put the lid on the jar.
  7. Turn the jar a few times a day until the sugar is fully dissolved.
  8. Put the jar in a cool, dark place and forget about it for 3-4 months.
  9. When ready to serve, put two cherries in a cordial glass along with some of the liquid.
Recipe Notes

Copyright © 2017 by VillaSentieri.com. All rights reserved.

Share this Recipe

Green Beans with Parmesan Cheese

August 7, 2017

It’s Saturday morning, August 5th and I’m sitting on an airplane writing this post.  I’m bound for Baltimore to visit the younger of my two nephews and his wife and their son.  I have meetings in Washington, DC on Monday and Tuesday so I’m taking this opportunity to visit.

The family members and relatives with whom I am closest are scattered around and I don’t see enough of any of them.

What does all of this have to do with green beans, you might ask?

Everything.

And nothing.

Food is my connector. It connects me to people and places. It evokes memories. It helps to create new ones. It’s a set of shared experiences.

I can’t make my mother’s long-simmered tomato sauce without evoking a slew of memories. My strongest olfactory memory from childhood is being gently awakened by the smell of garlic sizzling in olive oil on Sunday morning as my mother began to make tomato sauce for that day’s dinner. This is the sauce I am making on Sunday at my nephew’s house.

Most recipes that enter my repertory do so because of their connection with people and places. They document my personal history in edible form and cement memories of good times shared with family and friends. Many are family recipes, mine or those of people I know. Some are not, like the Italian Walnut Crostata I created to replicate one I had sitting at a little bar in Venice drinking grappa with my father-in-law in 1996.

That crostata has family connections of a sort. One of the favorite non-Italian desserts in our family is nut roll, brimming with ground sweetened walnuts and encased in just enough lightly sweet yeasted dough to hold it together as it is rolled and baked. While nut roll is more of a Central and Eastern European dessert, it was common in Johnstown, Pennsylvania where I grew up with people from a wide range of ethnic backgrounds.

My Aunt Margie’s nut roll filling is flavored with citrus, hewing toward the Italian, while my mother’s has milk and honey, pointing more towards Eastern Europe. I suspect, though cannot prove, that my Aunt Margie’s filling is more like her mother’s (my Italian grandmother) and my mother’s is more like my father’s mother’s (my Slovak grandmother).

Nut roll is a pastry that I truly miss but it is challenging to make and I have never tackled it despite having my mother’s and my Aunt Margie’s recipes. Except for the one time my cousin, Donna, made it and sent me some and the two times that Michael Alcenius sent me some he made using my Aunt Margie’s recipe, I have been in a nut roll blackout since Aunt Margie died.

The walnut crostata was a revelation. There, in an easy-to-make Italian sweet pastry crust (pasta frolla), was a filling of sweetened, ground walnuts. It wasn’t nut roll but it certainly evoked all the right taste sensations.

I used my husband’s Great Aunt Fidalma’s recipe for pasta frolla and Aunt Margie’s recipe for nut roll filling, to create a dessert that is both reminiscent of that night shooting grappa with my father-in-law in Venice and that preserves recipes from my family and my husband’s family.

Now that I’ve gotten my mouth (and maybe yours) watering for walnut crostata, we’re going to make green beans! I hope, though, that you have a better understanding for the reason this blog exists: to document and preserve traditional recipes along with some sort of a personal story or vignette.

Having just said that, I can’t tell you precisely where this recipe came from but it’s been in my repertory for decades. It is the essence of simplicity, a hallmark of much of Italian home cooking. It also lends itself to being made almost exclusively in advance, making it a perfect dish for a last-minute put-together when entertaining or making a more complicated main course.


Follow us


Click HERE to join our mailing list and you’ll never miss a recipe again!

Print Recipe
Green Beans with Parmesan Cheese
The beans can be cooked in advance and shocked in ice water to stop cooking. The garlic can be sautéed in olive oil in advance, too. Just before serving, heat the oil and toss the beans briefly to warm them. In a serving bowl toss the beans with Parmesan cheese, salt and pepper. This dish can easily be doubled or tripled. Adjust the amount of Parmesan cheese and garlic to your taste. The olive oil is an integral part of the “sauce” so be generous.
Votes: 0
Rating: 0
You:
Rate this recipe!
Course Sides, Vegetables
Cuisine Italian
Servings
Ingredients
Course Sides, Vegetables
Cuisine Italian
Servings
Ingredients
Votes: 0
Rating: 0
You:
Rate this recipe!
Instructions
  1. Wash the beans and cut off the ends. I like to cut the ends at an angle for a better appearance.
  2. Bring a large pot of salted water to a boil.
  3. Meanwhile, bruise the garlic with the side of a chef’s knife.
  4. Add the olive oil and garlic to a skillet, large enough to hold the beans, and heat on medium-low heat until the garlic begins to sizzle.
  5. Sauté, over low to medium-low heat until the garlic is golden.
  6. Remove and discard the garlic.
  7. Remove the oil from the heat.
  8. When the water comes to a boil, add the beans and boil until crisp-tender. This will take just a few minutes depending on the beans and your elevation. The beans should not be crunchy but they should have a distinct “toothiness” and almost squeak as you bite into them.
  9. Drain the beans.
  10. If preparing the beans in advance, shock in ice water.
  11. Add the drained beans to the garlic-flavored olive oil. Heat gently if the beans are cold.
  12. Off the heat, mix in the parmesan cheese, salt to taste, and a generous amount of freshly ground black pepper.
  13. Toss well and serve immediately.
Recipe Notes

Copyright © 2017 by VillaSentieri.com. All rights reserved.

Share this Recipe